I still don't know why GST is good for me. Other than adding on the cost of the purchase, what good does it give me? Btw, GST is enforced by Ministry of Domestic Trade, Cooperatives and consumerism.
I attended a seminar on GST conducted by a tax agent recently. As I am doing some trading business, I am made to be aware of the additional working capital to run my business. Apart from that, it is very important to keep track of the GST incurred in buying from suppliers and selling to customers. Otherwise, penalty, penalty, penalty!
Since my business incurs credit terms, my customers can sometimes pay me after 3 months or 4 months. For business sales volume of less than RM5 mil, I have to submit the GST (6%) of the sales amount in 3 months. That means to say that I have to come out with working capital to cover the GST even if customers do not pay me. The penalty of late submission is cumulative.
The zero rated supplies are live cattle, sheep, goats, ducts, fish, etc, eggs, potatoes, carrots and other vegetable, rice, wheat, flour, palm oil, etc, goods supplied to Langkawi, Labuan & Tioman, supply of treated water and 200 units of electricity for a month, education and childcare services, and exports are also zero rated.
Friday, 29 November 2013

Wednesday, 20 November 2013
Exercise For 50+
Time to get the proper regular exercise for both of us. 52th birthday is a few days away, and my hubby is 53+. I am concerned about my knee joints pain when I walk downstairs and general weakening of muscles, while my hubby puts on many weights after his hernia repair in Feb.
Jogging hurts my feet. What is best for us then? We decided to join Fitness Core by engaging a Professional Trainer thinking that the trainer should be able to design a program for me and my hubby to strengthen our muscles to reduce joint pain and back pain. It costs us on average RM100 per session. Each session is less than an hour. We don't use the machine much. So far we have only used the elliptical step machine and run on the treadmill. Other than paying the "Professional Trainer", we need to pay for membership to use the facility in Fitness Core. RM250p/m or RM540quarterly. Adding up it is quite a sum of money! After much consideration, we decided to stop the membership because we don't need to use the facility.
It was a coincidence that on the last time after doing our exercise in Fitness Core, we met a few friends in Lintas coffee shop. These few friends just had their thrice weekly exercise which use kettlebells and other exercises that are suitable for 50+....people who can't jump or run like the young days.
Jogging hurts my feet. What is best for us then? We decided to join Fitness Core by engaging a Professional Trainer thinking that the trainer should be able to design a program for me and my hubby to strengthen our muscles to reduce joint pain and back pain. It costs us on average RM100 per session. Each session is less than an hour. We don't use the machine much. So far we have only used the elliptical step machine and run on the treadmill. Other than paying the "Professional Trainer", we need to pay for membership to use the facility in Fitness Core. RM250p/m or RM540quarterly. Adding up it is quite a sum of money! After much consideration, we decided to stop the membership because we don't need to use the facility.
It was a coincidence that on the last time after doing our exercise in Fitness Core, we met a few friends in Lintas coffee shop. These few friends just had their thrice weekly exercise which use kettlebells and other exercises that are suitable for 50+....people who can't jump or run like the young days.
Sunday, 23 June 2013
Connecting Xperia Sola to Home WIFI
I bought an Xperia Sola for RM699 sometimes ago. It was annoying that I could only connect to home WIFI once in a blue moon when I have no problem accessing public WIFI. I called up Telekom and Sony mobile warranty center but each asked me to rectify the problem with the other party. My son said Telekom modem is not of good quality and getting a new TP-link modem would solve the problem.
Being an IT departmental head (though very small scale) before, I didn't give up searching for solution. Finally I read something about changing router channel. Eventually I called up Telekom customer service again to ask them to guide me how to change the channel. After changing the setting from 'auto' to channel 10, my problem is finally resolved!!!
Guess my two sons will look at me differently again!
Being an IT departmental head (though very small scale) before, I didn't give up searching for solution. Finally I read something about changing router channel. Eventually I called up Telekom customer service again to ask them to guide me how to change the channel. After changing the setting from 'auto' to channel 10, my problem is finally resolved!!!
Guess my two sons will look at me differently again!
Sunday, 28 April 2013
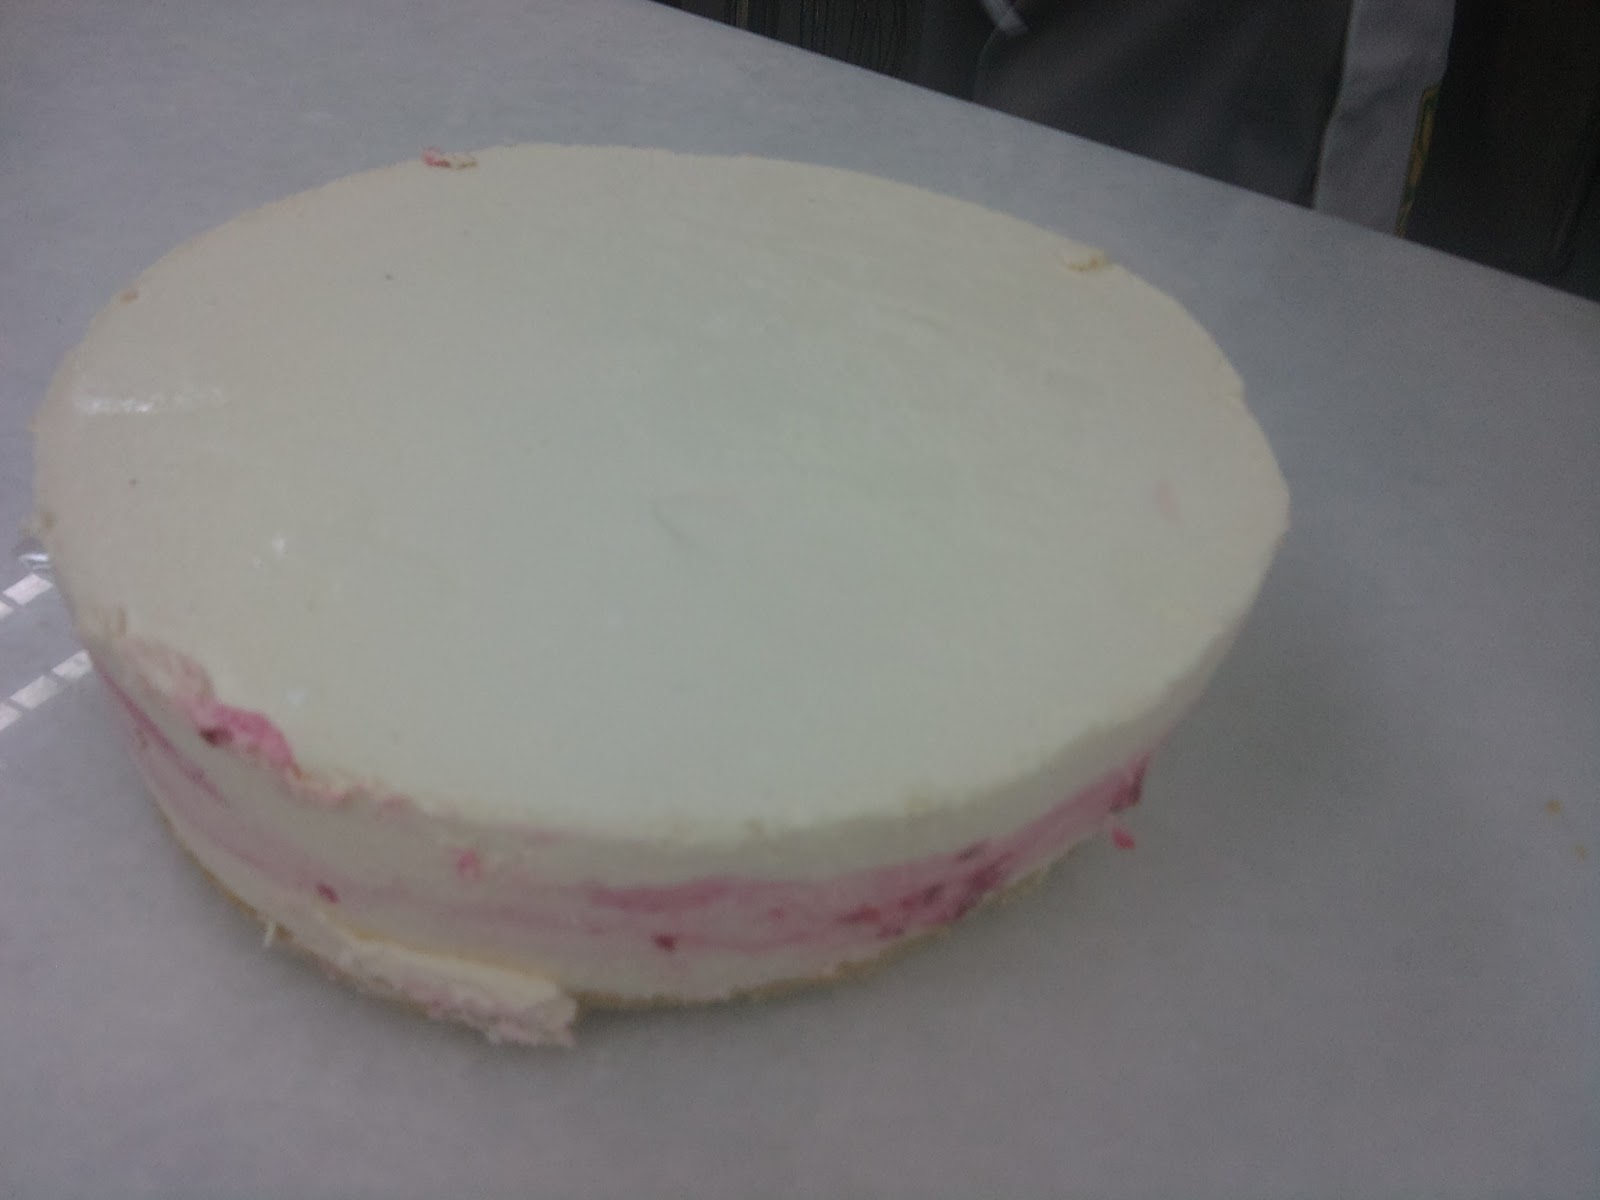
Cheese Cake - unbaked method
Ingredients: (Make four cheese cake)
(1)
500g cream cheese
150g sugar
(2)
400g fresh milk
9 egg yolk
(3)
45g gelatin
100g water
(4)
lemon juice from 1 lemon
500g whipped cream
2 sponge cake (can replace with any kind of biscuit. Usually Graham cracker and Oreo. I used Munchy's Marie)
Method:
1. Place cream cheese and sugar in a large bowl of a stand mixer fitted with a paddle attachment (you can use a hand mixer as well). Mix on low to break down the cream cheese for 30 seconds, and increase to medium speed for another 1 minute.
2. Mix gelatin with water in a bowl. Put the bowl in double pan. Stir to dissolve or until solution is clear, and allow to cool. Do not bring gelatin mixtures to a full boil or you risk losing its thickening properties.

3. Stir egg yolk with milk. Use double pan to warm the egg mixture until luke warm only. Be careful not to curdle the egg. Turn off the heat.

4. Stir in dissolved gelatin over eggs. Keep stirring until well-mixed.

5. Beat in beaten cream cheese until smooth.


6. Add lemon juice in batter.
7. Sift mixture.

8. Whip double cream until peak form.


8. Pour over sponge cake.


9. Refrigerate for at least 6 hours to set or overnight for best result.
(I am confused here. Did the teacher place the sponge cake on top of the batter so that when he turned upside down, the cake will become the base of the cheese cake? What I could remember was, he sank the pan in the hot water and quickly lifted it up because by doing so, the side would have melted enabling the cake to come out of the pan. Do not leave in hot water for too long. Else too much cream would melt. )


(1)
500g cream cheese
150g sugar
(2)
400g fresh milk
9 egg yolk
(3)
45g gelatin
100g water
(4)
lemon juice from 1 lemon
500g whipped cream
2 sponge cake (can replace with any kind of biscuit. Usually Graham cracker and Oreo. I used Munchy's Marie)
Method:
1. Place cream cheese and sugar in a large bowl of a stand mixer fitted with a paddle attachment (you can use a hand mixer as well). Mix on low to break down the cream cheese for 30 seconds, and increase to medium speed for another 1 minute.
2. Mix gelatin with water in a bowl. Put the bowl in double pan. Stir to dissolve or until solution is clear, and allow to cool. Do not bring gelatin mixtures to a full boil or you risk losing its thickening properties.

3. Stir egg yolk with milk. Use double pan to warm the egg mixture until luke warm only. Be careful not to curdle the egg. Turn off the heat.

4. Stir in dissolved gelatin over eggs. Keep stirring until well-mixed.


6. Add lemon juice in batter.
7. Sift mixture.

8. Whip double cream until peak form.


9. Spoon whipped cream into cream cheese batter. Use hand whisk to incorporate the batter.

8. Pour over sponge cake.


9. Refrigerate for at least 6 hours to set or overnight for best result.
(I am confused here. Did the teacher place the sponge cake on top of the batter so that when he turned upside down, the cake will become the base of the cheese cake? What I could remember was, he sank the pan in the hot water and quickly lifted it up because by doing so, the side would have melted enabling the cake to come out of the pan. Do not leave in hot water for too long. Else too much cream would melt. )


When you are confident with the basic method, you can make some variation. Teacher chopped up some strawberry, along with strawberry puree, to mix with a portion of the batter. He laid 1 layer of basic batter, next layer he laid the portion with strawberry, and the top layer is the basic batter again.


Saturday, 27 April 2013
Butter Cake - Creaming Method
There are three methods used in making butter cakes and the goal of each
method is to incorporate the maximum amount of air into the batter
(produces the volume and texture of the cake), to restrict the
development of gluten in the flour (provides tenderness, texture and
volume), and to have a uniform batter.
Sponge Cake
The success of making sponge cake largely depends on the amount of air whisked into the mixture. There is no fixed time for beating the sponge cake mix and eggs.
It depends on the type of cake mixer used. If using small cake mixer,
it is better to use cold eggs and cold water from the fridge for easy
rising.
You can also make swiss roll using the same recipe.
Oven: Preheat oven for 15 minutes before baking. 170/175 bake for 30 min
Ingredients:
1 kg sponge mix
1 kg eggs (about 20)
250ml water
250ml oil
Method:
1. Beat eggs lightly.
2. Put sponge cake mix flour into the beaten eggs.
3. Use low speed to mix into smooth batter.
4. Increase to high speed and beat batter until white and creamy.
5. Add water and continue to beat until light and fluffy.
6. To Test, use mixture to drip into a "O" shape and it can keep the shape for 10 seconds.
7. Use a plastic spatula and mix in the melted butter in ONE DIRECTION until well-combined.
DONT
over-mix the mixture . If mixture starts to break up and turns watery,
it means air bubbles have broken up and the cake texture will be coarse
and hard.
8. Pour the mixture into a lined and greased baking tin, bake in a pre-heated oven at 180degC for 30 to35 minutes or until cooked and golden brown.
8. Remove and leave to cool.
Donut
Ingredients:
1 kg flour
11g yeast
340ml water
60ml full cream milk
2 eggs
180g margarine
160g sugar
10g salt
14g baking powder
nutmeg (optional)
Method:
1. In a separate bowl, whisk together the flour, baking powder, salt, and freshly ground nutmeg.
2. In the bowl of your electric mixer, fitted with the paddle attachment (or with a hand mixer), beat the eggs and sugar until thick and a pale yellow (about five minutes). Beat in the vanilla extract.
3. With the mixer on low speed, alternately add the flour mixture (in three additions), with the milk and melted butter (in two additions), beginning and ending with the flour. (The batter will be quite soft.)
4. Cover with plastic wrap and let sit at room temperature about 30 minutes (or until batter is firm enough to roll).
5. Then place the dough on a floured surface, and with a lightly floured rolling pin, roll the dough to a thickness of about 1/4 inch (.5 cm). Cut the dough into rounds, using a lightly floured doughnut cutter or cookie cutter (will need a smaller cookie cutter to cut out the center "hole").
6. Place the doughnuts on a lightly floured baking sheet, lined with parchment or wax paper. Gather up the scraps, roll, and cut out remaining doughnuts. If you like, you can keep the donut holes to fry separately. Let the doughnuts sit at room temperature while you heat the oil.
7. Fry each side until golden brown, about 60 seconds per side. The doughnut holes will only take about 30 seconds per side. Carefully remove the doughnuts from the hot fat with the end of a wooden spoon, tongs, slotted spoon, bamboo chopstick, or Chinese skimmer.
8. Place on a baking sheet lined with clean paper towels. Let the oil return to 375 degrees F (190 degrees C) before adding more doughnuts. After the doughnuts have cooled about a minutes or two, you can roll them in granulated white sugar. Or let cool completely and then dust with powdered sugar or dip in the chocolate glaze.
1 kg flour
11g yeast
340ml water
60ml full cream milk
2 eggs
180g margarine
160g sugar
10g salt
14g baking powder
nutmeg (optional)
Method:
1. In a separate bowl, whisk together the flour, baking powder, salt, and freshly ground nutmeg.
2. In the bowl of your electric mixer, fitted with the paddle attachment (or with a hand mixer), beat the eggs and sugar until thick and a pale yellow (about five minutes). Beat in the vanilla extract.
3. With the mixer on low speed, alternately add the flour mixture (in three additions), with the milk and melted butter (in two additions), beginning and ending with the flour. (The batter will be quite soft.)
4. Cover with plastic wrap and let sit at room temperature about 30 minutes (or until batter is firm enough to roll).
5. Then place the dough on a floured surface, and with a lightly floured rolling pin, roll the dough to a thickness of about 1/4 inch (.5 cm). Cut the dough into rounds, using a lightly floured doughnut cutter or cookie cutter (will need a smaller cookie cutter to cut out the center "hole").
6. Place the doughnuts on a lightly floured baking sheet, lined with parchment or wax paper. Gather up the scraps, roll, and cut out remaining doughnuts. If you like, you can keep the donut holes to fry separately. Let the doughnuts sit at room temperature while you heat the oil.
7. Fry each side until golden brown, about 60 seconds per side. The doughnut holes will only take about 30 seconds per side. Carefully remove the doughnuts from the hot fat with the end of a wooden spoon, tongs, slotted spoon, bamboo chopstick, or Chinese skimmer.
8. Place on a baking sheet lined with clean paper towels. Let the oil return to 375 degrees F (190 degrees C) before adding more doughnuts. After the doughnuts have cooled about a minutes or two, you can roll them in granulated white sugar. Or let cool completely and then dust with powdered sugar or dip in the chocolate glaze.
Subscribe to:
Posts (Atom)